Congratulations! You've reached the second half of this tutorial.
Now that we've got a toy UI library, let's put it to use and make a sample application that demonstrates an architecture for managing state that I've found to be useful.
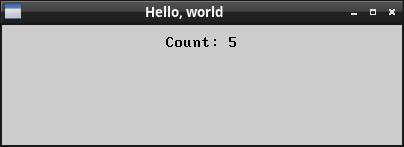
We have a bit of a problem. What we've made is a known as a 'retained mode' UI library. That is, the UI maintains a partial copy of the state of our application in order to present it to the user. For example, consider the simple monotonic counter application we made at the end of Part 10.

At the start of the application and after the user clicks the button, we have to go out of our way to adjust the text of the label to reflect the new value of the count variable. This was not too difficult, as the application was very simple. But you can imagine that as an application grows in complexity, keeping the UI synchronized with the actual state of the application/document becomes challenging. We need a good method of structuring our application and its state that will allow for everything to work itself out nicely, without having to resort to drastic measures like resyncing the entire application state with the UI every single update.
We're going to write a sample application, then slowly rewrite it using the new architecture. The sample application is arguably too simple to really warrant the architectural changes we're going to make, but I think it makes a good demonstration of how everything works. It's a trade-off: the more complicated the example the less understandable, but the less complicated the example the less the changes are necessary in the first place. I hope that once you have finished reading the tutorial you will be able to make the judgement call of when implementing such an architecture is suitable. Nonetheless, after implementing the architecture you will see how nicely features such as serialization and undo fit in, which is how I came to decide I liked this architecture, after previously struggling with metaprogramming and such to implement these.
We begin by setting up a very simple application.
#include <stdint.h>
#include <stdio.h>

// Include the library we finished writing in the previous article.
#include "ui_library_tutorial.c"
We are going to make a single count variable, and display its value in a label. We introduce a few global variables,
int count;
Label *labelCount;
Panel *row;
And then we are ready to create the UI. Depending on whether we're using the Windows platform layer or not, we'll switch between the WinMain and main entry points. This way, when running on Windows, a command prompt won't be forced to open with our application.
#ifdef PLATFORM_WIN32
int WinMain(HINSTANCE instance, HINSTANCE previousInstance, LPSTR commandLine, int showCommand) {
#else
int main() {
#endif
We set the count variable to some initial value.
count = 5;We then create our window and put a layout panel inside it.
Initialise();
Window *window = WindowCreate("Hello, world", 400, 120);
Panel *panel = PanelCreate(&window->e, PANEL_GRAY);
panel->border = RectangleMake(10, 10, 10, 10);
panel->gap = 15;
We then add a container to our panel and a row to the container. I'm aware this is a bit superfluous at the moment, but the reason for the nesting of panels will become clear later on in the tutorial.
Element *container = &PanelCreate(&panel->e, ELEMENT_H_FILL | ELEMENT_V_FILL)->e;

row = PanelCreate(container, PANEL_HORIZONTAL | ELEMENT_H_FILL);
Finally, we create the label in the row, and then go into the message loop.
char buffer[64];
snprintf(buffer, sizeof(buffer), "Count: %d", count);
labelCount = LabelCreate(&row->e, ELEMENT_H_FILL | LABEL_CENTER, buffer, -1);

return MessageLoop();
All standard stuff, I think.
 part13.c